How to Use Staff Scheduling
Key word | Key word
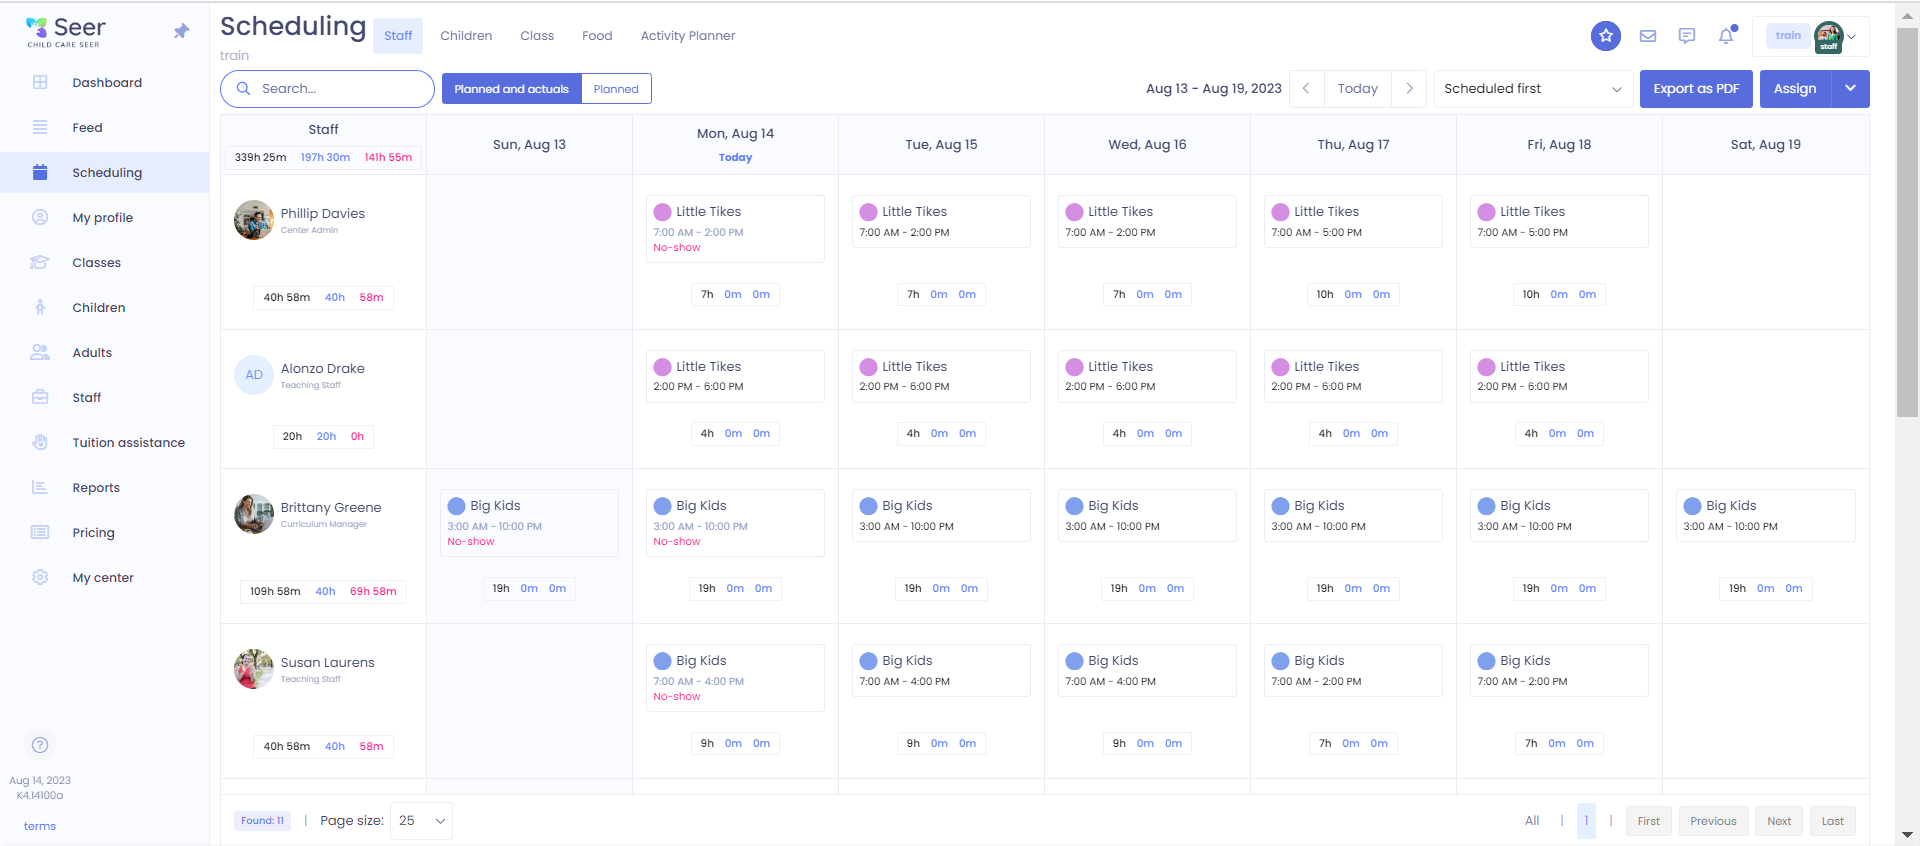
In this training article, we will cover how to write your staff schedule inside Seer. To do this you will go to the scheduling menu and make sure you are on the staff tab. This will be where it will display your schedule for all active staff members in your center. You can choose how you wish to view your staff schedule by either staff members alphabetically, or you can choose to have it by staff who are already scheduled with the scheduled first filter.
1. To assign a staff member to a schedule, you will click on the blue assign button. When you click on the assign button, a modal will come up.
2. Enter in the day and time, select the staff, and the class. If you have a scheduled time that needs to be assigned to multiple days instead of just clicking assign when you finish filling this information out, click on assign to multiple days.
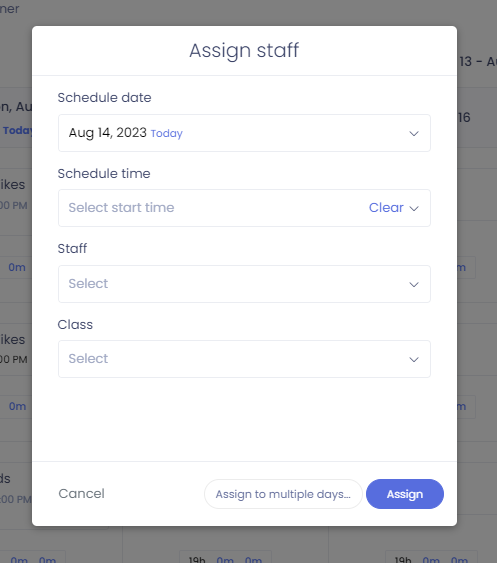
3. Click on the days you want to assign the same schedule to. Enter a start day and it will continue from week to week until you change it. You can also click on custom dates and click the dates specific days you would like to assign the schedule to this staff member. When you complete the assignment, click on assign.
4. After you click assign, you will see the assignment on the calendar. Once you have completed all of your scheduling, you may wish to visit your schedule insights page to see if you have any gaps in coverage.
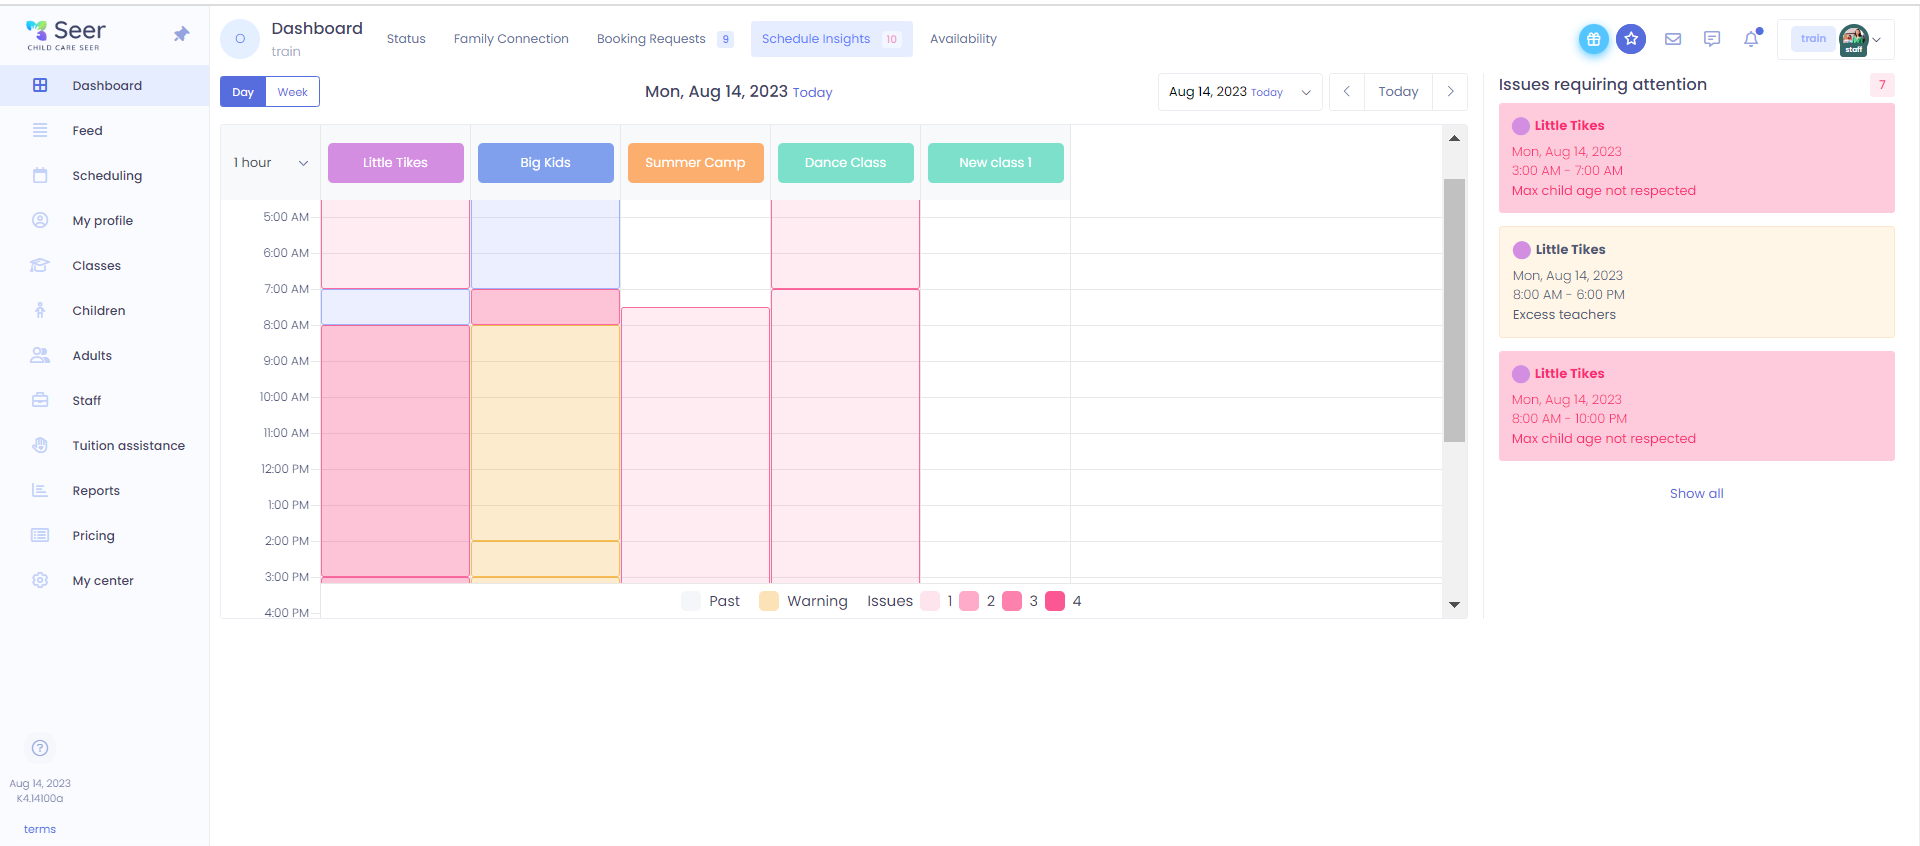
Please Note: As you can see in this example, there are some gaps in the schedule. Scheduled insight will tell you how many children you have scheduled in the class vs how many teachers are needed, and is a great tool to use.
If things change for the day and you need to either add a staff member to planned absent or change the classroom they are in you will just simply click on the day of the assignment and choose between edit assignment, unassign, or move to absent.
When you click on either of those options, a modal will come up for you to input the information you want to change. When moving to absent you will choose between no-show, sick, call, vacation, or other. Then click save. Then you will see that the staff is now marked as absent from the schedule.
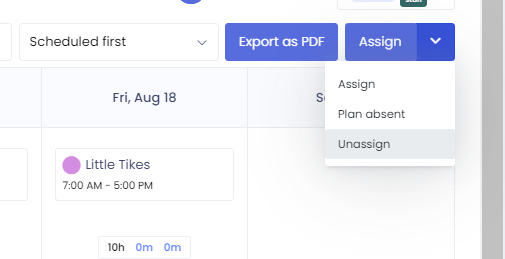
If you need to unassign a staff member, please use the same flow as assigning while choosing the Unassign option that can found by the dropdown next to the blue Assign button on the Main scheduling page. You will enter the times you wish for the staff member to be unassigned. For full un-assignment of staff, just pick your dates and times as everyday and open to close hours of your center.