Center Linking
How to link your centers activity planners
In this training article, we will cover center linking. Do you have multiple centers using Child Care Seer? Do they use the same curriculum and activities? Now you can complete the Activity Planner for just one “master” center and link all the others to the same information! Yes, you read that correctly – enter your activities one time in the main center, link the other centers to it, and then view, customize, and use those activities in Family Connection for all locations. For more details or to get linked up, please contact Customer Success via the Help button.
In this article you will learn about the following:
- What is Center Linking?
- How to use Center Linking
- Limiting view
What is Center Linking?
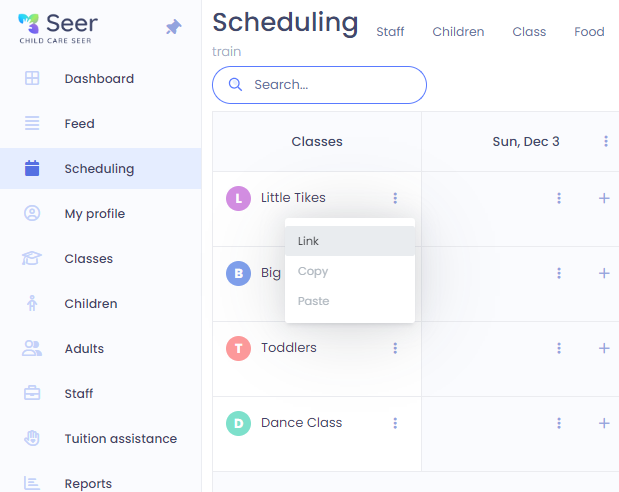
Center linking is linking two childcare centers together in the activity planner feature of Seer. This feature is very helpful if you have several centers. Once center can put in the activity/ lesson plans and then a customer success can link the two centers together, so that you both have access to the lesson plans/activities. In order to link centers together, you will need to send a help request or call customer success. We can also walk through the process with you for this feature other than just this training article. The great thing about linking is that you are able to add in custom activities to your planner as well as the linked activities. Once you have made the choice to link centers and have talked to someone in customer success, you will go into your activity planner under scheduling.
Please Note: We’ve added several new features to the Activity Planner. Now, when adding an activity, you can specify Learning Indicators, create a Supplies List, and indicate whether documents and links should be displayed in the Daily Journal and/or printed before starting the lesson in class. The Activity Planner will show a brief summary view of each activity with quick tool-tip access to information needed before completing an activity, such as supplies and teacher notes. To view the full description, simply click to expand the activity. You’ll also see a new menu option: Hide and Unhide. This option is especially useful when an activity must be rescheduled at the last minute. Simply hide it and the class device will automatically remove the activity from the day’s events.
You may also limit how many weeks in the past and into the future that a center may view an activity plan. Setting these limits will need to be done by a Customer Success representative.
How to use center linking
Once these centers are linked, you will have the ability to start using several new actions on the activity planner. To explain these actions we will describe them and how they relate to the other centers from the center taking the action. We will refer to these to centers as the source center and the linked center. Once you have clicked on the activity planner you will see these link symbols and tell you that these classrooms are linked to another school. Now, even though these schools are linked to one another, this school can still enter in their own custom lesson plans/activities for their class. It is important to note that the linked center cannot ever delete an activity from the source center. In the event that you need to make edits, copy and paste the activity and then use the hide feature on the original one coming from the source center.
Please Note: Source Center: this is the center that your other centers will link their activities from. When using Center linking, this will be the center you will build your curriculum on.
Linked Center: this is the center that will grab the created activities from source center.
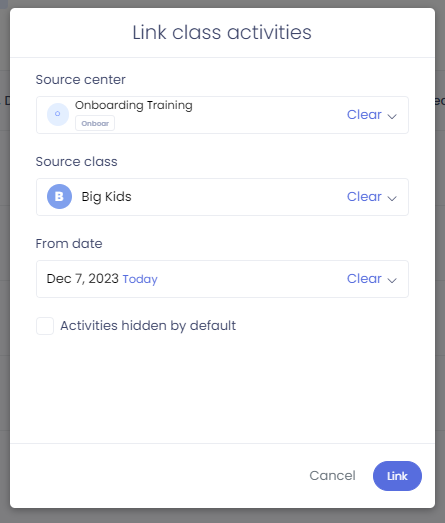
Link: When you create a link, you will choose the date from which the material will be linked. If you ever want to unlink, simply click on the blue link bar that is created and you will see an option to break the link. When used from the source center, you will only have the ability to link to another class within this center. You will use this for when you want different classes to use the same material. When used from the linked center, it will grab the activities from the class you select to link in the source center. You will also have the ability to link another class within the linked center as well. Let's look at an example of how this may look in a center.
Ex. Source center creates activities for a Toddlers class. The linked center has two different rooms that run Toddlers and will use the same activities. The linked center will link the first Toddlers class to the source center to grab curriculum. You will then link the second Toddlers class to the first one so if you need to make a copy and edit the material from the source center, it will change for both classes.
Hide: this is used when you don't want others to see the created activity. From a source center, this will make the activity not visible within the linked center. In a linked center, this will simply make it where the teachers will not see the activity on their class device.


