Tuition Assistance- Commitment Basics
Key word | Key word
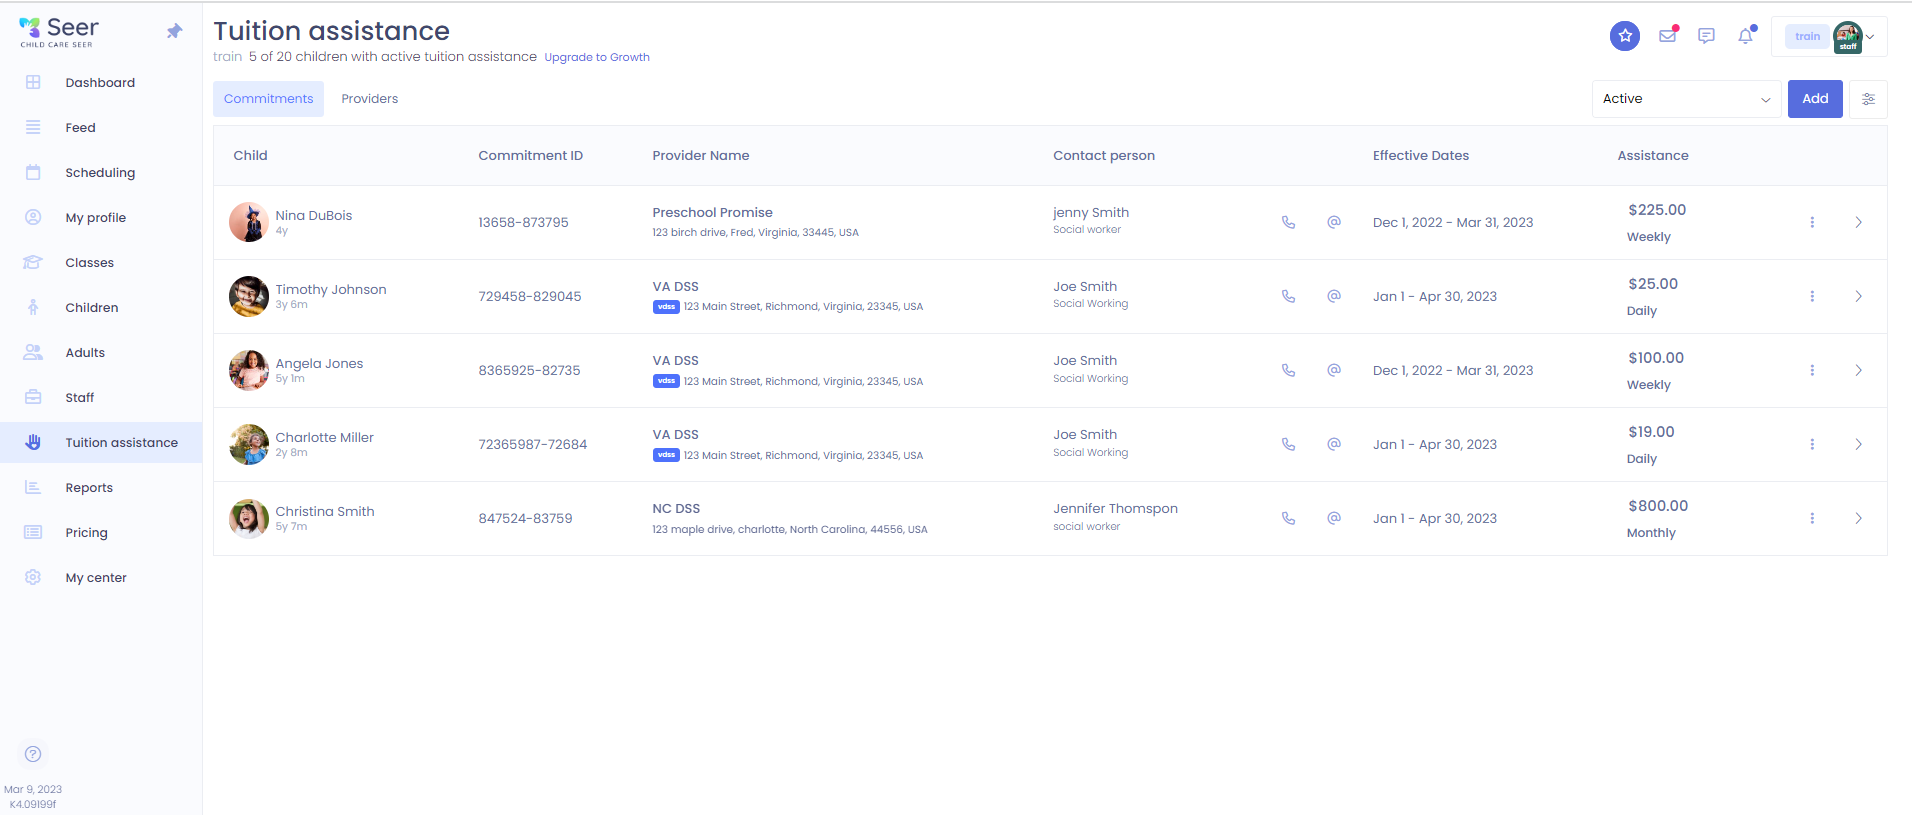
In this training article, we will cover how to set up the commitment piece to tuition assistance. Setting up the commitment piece to tuition assistance is much like the providers. You will go to the tuition assistance tab on your side menu.
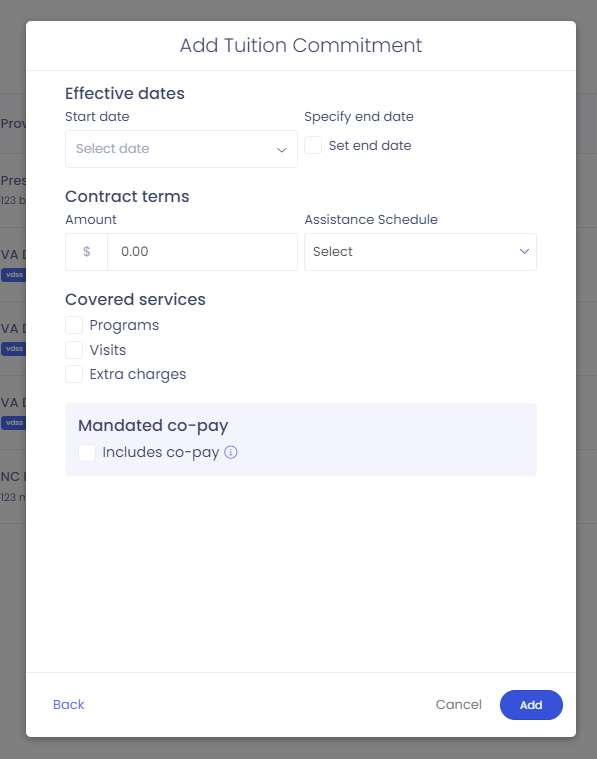
1. When you are on this page, you will click on the blue add button. A modal will come up and you will select the child, and provider. Set the contact person who will handle their commitment and enter its ID here. If there is a new contact, you can always add that in from here as well. If you wish to leave additional notes you can do that in the notes section. Any scanned contract you have can be uploaded with the Browse button as well. When you have done all these items, you will click next.

2. On the next modal, you will enter the start date, end date if you have one, amount covered, assistance schedule(daily, weekly, biweekly, or monthly), covered services. The covered service part is what the assistance can be added too. For normal weekly or monthly tuition, choose programs. When you have added that information you will click the blue add button.
Note: If subsidy is going to cover something like an enrollment fee your center may have, make sure you check the extra charges box as well!
3. When you have selected add, you will then see the commitment. You can choose to view which commitments you have from the filter to the left of the blue add button. They will be all commitments, active, ended and archived. Whether a commitment is active or not depends on if there is an end date set to the commitment. Commitments that are archived are not in use even if they are within their current dates. To archive a commitment, this child must not have it attached to any enrollments.


